10 DIY Checks Before Calling for HVAC Repair in Garrett, IN
When your heating or cooling system stops working the way it should, it’s easy to panic and grab the phone to call an HVAC company. But sometimes, the solution is simpler than you think—and it doesn’t require a service call at all.
At T&T Plumbing & Heating, Inc., we’ve seen many homeowners in Garrett, IN, pay for repairs that could have been avoided with a few quick checks, which is why we’ve put together this heating and AC repair troubleshooting guide.
Before you call in an HVAC contractor, take a few minutes to work through these common issues. You might just get your air conditioner or furnace running again without spending a dime.
1. Check Your Thermostat Settings
One of the most common and most overlooked issues in heating and AC repair troubleshooting is an incorrect thermostat setting. Kids playing with buttons, a recent power outage, or even a seasonal switch from heat to cool can leave your thermostat on the wrong setting.
- Make sure it’s set to “Cool” in summer or “Heat” in winter.
- Make sure the fan is set to “Auto” rather than “On.”
- Double-check that the thermostat temperature setting is appropriate. If your thermostat is set to 78°F in cooling mode, the AC system won’t kick on until the indoor temperature rises above that point.
If your thermostat runs on batteries, replace them. A dying battery can cause the display to fade, buttons to stop responding, or the system to misread the temperature.
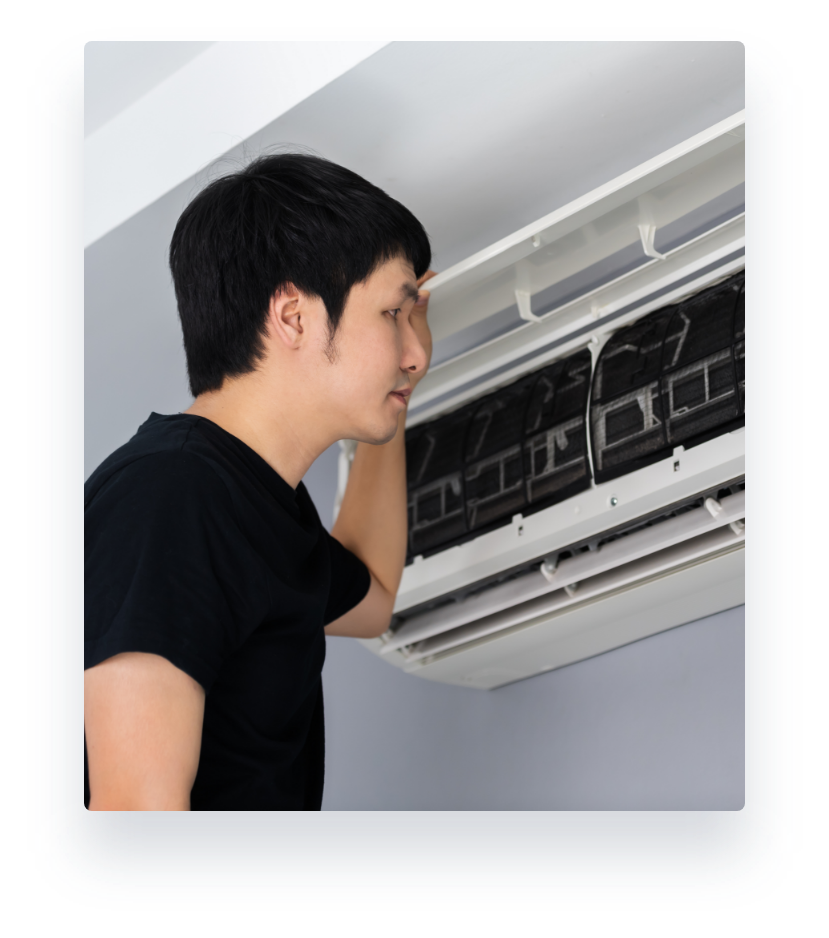
2. Inspect Your Air Filter
restricted, your heater or air conditioning system has to work harder. A clogged air filter can cause weak airflow, uneven temperatures, or even complete shutdown.
For furnace, heat pump, and air conditioner troubleshooting, this is one of the fastest fixes:
- Locate your filter. It’s usually in a slot near the return air duct or inside the furnace or indoor air handler cabinet.
- If it looks gray, dusty, or clogged, replace it.
- Standard filters should be replaced every 1–3 months depending on usage and whether you have pets or allergies as part of regular AC maintenance.
A fresh filter not only restores proper airflow but also protects your system from dust and debris.
3. Look for a Tripped Circuit Breaker
Sometimes your HVAC unit stops working simply because the circuit breaker tripped or there’s a blown fuse in the panel. A tripped circuit breaker can happen if the system draws more power than usual, which is often due to a dirty filter, a blocked condenser coil, or even just a temporary power surge.
If your furnace or AC is not turning on, here’s what to do:
- Go to your home’s electrical panel.
- Look for any circuit breakers in the “Off” position or stuck between “On” and “Off.”
- Flip the circuit breaker fully off, then back on.
If your breaker panel uses cartridge fuses instead, check for blown fuses in the HVAC circuit. You can usually spot a blown fuse by looking for a broken filament inside or by using a multimeter to test for continuity.
Many HVAC systems also have small fuses in the outdoor heat pump or air conditioning unit disconnect box. These can blow during power surges or if there’s a short. If you find a blown fuse, replace it with one of the exact same type and amperage.
If the circuit breaker trips or the fuse blows again quickly, don’t force it. This may indicate an electrical issue, like faulty wiring or a bad AC contactor, that needs professional attention versus DIY air conditioner troubleshooting.
4. Clear the Outdoor Unit
If you have a central air conditioning unit or a heat pump, your outdoor condenser unit needs plenty of airflow to work properly. Dirt, leaves, grass clippings, and even stacked lawn furniture can block airflow, cover condenser coils, and cause the system to overheat or shut down.
- Remove any debris around the heat pump or outside AC unit.
- Trim plants and shrubs so there’s at least two feet of clearance on all sides.
- Use a gentle stream of water from a garden hose to rinse off dirt from the coil fins—never use a pressure washer.
This simple AC repair troubleshooting step can help your system cool more effectively, lower your energy bills, and prevent unexpected breakdowns.
5. Check Your Air Vents
Closed or blocked vents can cause uneven heating or cooling and strain your system. During AC repair troubleshooting, make sure:
- All supply vents are open and unobstructed.
- Furniture, rugs, or curtains aren’t covering vents.
- Return vents are clear and not blocked by large objects.
Good airflow is critical for keeping your system running efficiently.
6. Inspect the Switch or Disconnect
For heating problems, your furnace may simply be switched off. Furnaces often have a power switch that looks like a regular light switch located nearby—sometimes on the side of the unit or on the wall. An outdoor AC unit or heat pump will also have a disconnect switch.
- Make sure the switch is in the “On” position.
- If your AC isn’t working, check for a service disconnect box near the outdoor unit. Make sure the pull-out disconnect is fully seated.
It’s an easy heating and AC repair troubleshooting win if the problem is just a flipped switch.
7. Thaw a Frozen Coil
If your AC unit or heat pump is blowing warm air in the summer, you might have a frozen evaporator coil. Causes can include dirty filters, low refrigerant, or poor airflow.
- Turn the thermostat to “Off” and the AC fan to “On.” This circulates warm air through the unit to help thaw the coil.
- Replace the air filter and make sure vents are open.
- If ice forms again, call a professional. This could indicate a refrigerant leak.
Thawing the coil can get your cooling back temporarily, but it’s important to address the root cause. If the evaporator coil ices over again, you should call in our team to check your heat pump or AC system and solve the problem for good.
8. Check for a Clogged Condensate Drain
Air conditioners and heat pumps remove humidity from the air as they cool, and that moisture drains through a drain pan and condensate line. If the line clogs, some systems have a safety switch that shuts the unit off to prevent water damage.
These AC problems can often be solved with troubleshooting:
- Locate the drain line near your indoor unit.
- Use a wet/dry vacuum to clear any blockages and ensure proper drainage.
- Pour a cup of vinegar or bleach into the drain line every few months to prevent algae buildup.
While you’re there, inspect the drain pan located beneath the evaporator coil. If the pan is full of water, it can trigger the same safety shutoff. Remove standing water with a wet/dry vacuum or a turkey baster, then dry the pan completely. If water continues to collect after clearing the drain, you may have a deeper blockage or a pump failure that needs professional service.
9. Reset Your System
Sometimes, your HVAC system just needs a fresh start. Power surges, temporary glitches, or minor control board issues can often be resolved by resetting the heating or AC unit.
- Turn off your thermostat.
- Switch the HVAC system breaker off for 30 seconds.
- Turn the breaker back on and reset your thermostat to the desired settings.
This is a quick AC repair troubleshooting method that can save you a service call.
10. Inspect Your Air Ducts for Leaks
If you notice weak airflow or hot and cold spots, your ductwork could be leaking. While full duct repair is a job for the pros, you can check for obvious gaps or disconnected sections in accessible areas like the attic or basement.
- Seal small leaks with foil HVAC tape (never duct tape—it doesn’t hold up).
- Make sure insulation is intact around ducts in unconditioned spaces.
Even small duct leaks can waste energy and make your system work harder.
When to Call a Professional
If you’ve worked through these heating and AC repair troubleshooting steps and your system still isn’t working right, it’s time to bring in a trained technician. Problems like refrigerant leaks, blower motor failures, and electrical issues should always be handled by a licensed HVAC professional for safety and warranty protection.
T&T Plumbing & Heating, Inc. provides expert HVAC repair for Garrett, IN, homeowners. Our team can quickly diagnose and fix the issue so your home is comfortable again. And, our regular maintenance services can help you avoid many of these issues altogether.
Save Time and Money With Simple HVAC Fixes
Before picking up the phone for HVAC service, try these simple furnace, heat pump, and AC repair troubleshooting tips. Many common heating and cooling problems are caused by minor issues like dirty filters, blocked vents, or incorrect thermostat settings. By checking these first, you can save time, money, and frustration.
And if the problem turns out to be more serious, you’ll know you’ve done everything possible before calling in the experts. When that time comes, T&T Plumbing & Heating, Inc. is here to help with fast, friendly, and professional heating and AC repair in Garrett, IN.